Meet Alexa, marketer by day, Maker by night
“Baking should be fun, and the result should be something delicious! When I bake, it’s not extremely pretty, but I love it, and that’s what matters.”
See Her Profile
This show-stopping, two-tier cake is just the dessert you need to get the party going! Each bite of the cake is sweet and delicious. Featuring a delightful combination of vanilla and chocolate batters, this cake is made even easier with a checkerboard cake tool, ensuring a stunning effect every time you cut a slice. End the night or start your day with this wickedly delicious checkerboard cake inspired by the Wicked Witch herself.
Frequently Asked Questions
Wickedly Delicious Checkerboard Cake
- Prep Time 60 min
- Total 2 hr 0 min
- Servings 12
- Ingredients 7
Ingredients
Cake
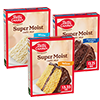
- 1 box Betty Crocker™ Super Moist™ Vanilla Cake Mix
- Water, vegetable oil and eggs called for on cake mix box
- 1 box Betty Crocker™ Super Moist™ Chocolate Fudge Cake Mix
- Water, vegetable oil and eggs called for on cake mix box
Frosting & Decoration
Instructions
-
Step1Heat your oven to 350°F. Grease 2 (9-inch) round cake pans and set them aside.
-
Step2In large bowl, prepare the vanilla cake mix batter, using water, oil and eggs called for on cake mix box, according to the instructions on the box. Set aside. In separate large bowl, prepare the chocolate fudge cake mix batter, using water, oil and eggs called for on cake mix box, according to the instructions on the box.
-
Step3Place checkerboard ring insert into a prepared pan. (For best results, follow the instructions included with the checkerboard cake divider kit to evenly divide batters between pans.) Pour a little more than half of the prepared vanilla batter into the outer and center rings. Then, pour chocolate batter into the middle ring. Carefully remove the ring by pulling straight up. Clean the ring insert and place in the second prepared pan. Pour remaining chocolate batter into the outer and center rings. Then, pour remaining vanilla batter into the middle ring. Carefully remove the ring by pulling straight up.
-
Step4Place both cake pans in the oven and bake for 28 minutes. After 28 minutes, use a toothpick to check if the cakes are done baking. If the toothpick comes out clean or with a few crumbs, they are ready. If there is wet batter, return the cakes to the oven for a few additional minutes.
-
Step5Once baked, allow the cakes to cool in the pans for a few minutes. Then, transfer both pans to the freezer for 30 minutes (or up to an hour) to help the frosting adhere better. It’s fine if the cakes are slightly warm when placed in the freezer.
-
Step6Meanwhile, in medium bowl, combine both vanilla frostings. Remove the cakes from the freezer and from the pans. Place one cake layer on a serving plate. Using a piping bag, add frosting around the outer edges of the first cake layer. Spin the cake on a lazy Susan while using an icing spatula to evenly frost.
-
Step7Carefully place the second cake layer on top of the first and repeat the frosting process on the top layer.
-
Step8Gently add frosting to the outer sides of the cake using your icing spatula. This step requires patience; spread the frosting slowly until the entire cake is covered.
-
Step9Use a bread scraper to smooth out the frosting on the outer edges, ensuring an even finish.
-
Step10Finally, top the cake with fun green and pink sprinkles for a festive touch!
Nutrition
Nutrition Facts are not available for this recipe
© 2025 ®/TM General Mills All Rights Reserved


