How to Make Two-Crust Pie
Learning how to make two-crust pie pastry from scratch isn’t hard. Betty’s Two-Crust Pie Pastry requires 20 minutes of prep and 1 hour and 5 minutes total to make. This recipe serves 8.
What You’ll Need
- 2 cups, plus 2 tablespoons Gold Medal™ all-purpose flour
- 1 teaspoon salt
- 2/3 cup cold shortening or if you prefer, substitute cold butter, cut into ½-inch pieces, for half of the shortening.
- 6 to 8 tablespoons ice-cold water
- Pastry blender or fork
- Plastic wrap
- Rolling pin
- Knife or kitchen shears
- 9-inch glass pie plate
1. Make Pastry: Mix flour and salt in medium bowl. Cut in shortening, using pastry blender or fork, until mixture forms coarse crumbs the size of small peas. Sprinkle with the water, 1 tablespoon at a time, tossing with fork until all flour is moistened and pastry almost leaves side of bowl (1 to 2 teaspoons more water can be added, if necessary).
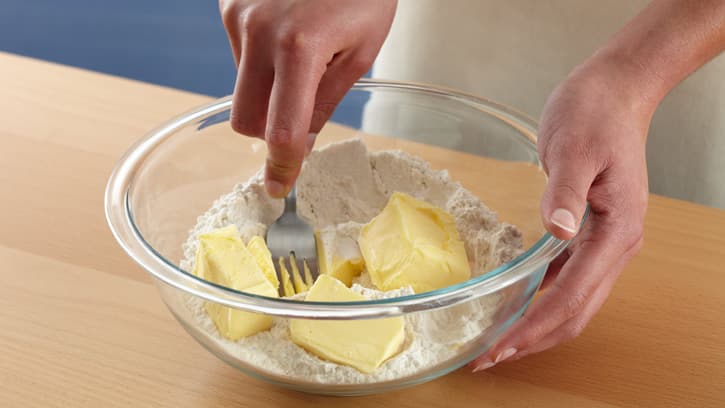
2. Chill Pastry: Gather pastry into ball. Divide in half; shape into 2 flattened rounds on lightly floured surface. Wrap rounds in plastic wrap and refrigerate 45 minutes or until dough is firm and cold, yet pliable. This allows the shortening to become slightly firm, which helps make the baked pastry flaky. If refrigerated longer, let pastry soften slightly at room temperature before rolling.
3. Roll Out Bottom Crust: Using floured rolling pin, roll one pastry round on lightly floured surface into a round 2 inches larger than upside-down 9-inch glass pie plate.
4. Transfer Pastry to Pie Plate: Fold pastry into fourths and place in pie plate or roll pastry loosely around rolling pin and transfer to pie plate or tart pan. Unfold or unroll pastry and ease into plate or pan, pressing firmly against bottom and side and being careful not to stretch pastry, which will cause it to shrink when baked.
5. Fill Crust: Spoon desired filling into bottom crust. Trim overhanging edge of bottom crust 1/2 inch from rim of plate.
6. Roll Out Top Crust: Roll other round out. Fold into fourths and place over filling; or roll loosely around rolling pin and place over filling. Unfold or unroll pastry over filling. Cut slits in pastry so steam can escape.
7. Flute Edge: Trim overhanging edge of top pastry 1 inch from rim of plate. Fold edge of top crust under bottom crust, pressing on rim to seal; flute edges. Bake as directed in desired pie recipe.
Alternative Method: Making Pie Pastry in a Food Processor
- Measure 2 tablespoons ice-cold water for One-Crust Pie or 4 tablespoons ice-cold water for Two-Crust Pie into liquid measuring cup; set aside.
- Place flour, salt and shortening in food processor. Cover and process, using quick on-and-off motions, until particles are the size of small peas.
- With food processor running, pour water all at once through feed tube just until dough leaves sides of bowl (dough should not form a ball).
How to Make One-Crust Pie
It’s not hard to learn how to make a One-Crust Pie with Betty as your guide. Meringue-topped or custard pies, like pumpkin pie and French silk pie, typically only have one crust.
Pro Tip: For convenience, you can make the Two-Crust Pie recipe and store half the pastry in the freezer for a quick one-crust pie later. For best results, freeze pastry in a round tightly wrapped in plastic wrap.
What You’ll Need
- 1 cup, plus 1 tablespoon Gold Medal™ all-purpose flour
- 1/2 teaspoon salt
- 1/3 cup cold shortening
- 3-5 tablespoons ice-cold water
- A medium mixing bowl
- Pastry blender or fork
- Plastic wrap
- Rolling pin
- Knife or kitchen shears
- 9-inch glass pie plate
Follow steps 1-5 of the Two-Crust pie recipe above. After trimming overhanging edge, fold under to form standing rim; flute edges.
This recipe serves 8. It requires 20 minutes of prep and 1 hour and 5 minutes of total time.
How to Blind Bake Pie Crust
You will want to know how to blind bake a pie crust anytime you are making a pie with filling that does not need baking — such as French Silk Pie — or when you want to ensure the crust does not become soggy.
This recipe for Perfect Baked Pie Crust will walk you through the simple steps:
- Heat oven to 475°F.
- Prick bottom and side of pastry thoroughly with fork.
- Bake 8 to 10 minutes or until light brown; cool on cooling rack.
How to Make Pie Top Crust
Now for the fun part — learning how to make a beautiful top crust for your pie. Traditionally, many fruit pies, like apple and cherry, are covered by lattice crusts or whole crusts. But don’t feel hemmed in by tradition, there are even more ways to beautify your pie.
A lattice top crust adds a nice touch to a two-crust pie, letting the filling peak through. For an easy “wow,” try one of these methods for the top pastry of your pie. Using a pastry wheel adds a decorative touch to a lattice crust.
This feature is not available with your current cookie settings.
You can update your privacy settings to enable this content. Please enable all cookies to use this feature.
Easy Lattice Top
Make pastry for Two-Crust Pie, except trim overhanging edge of bottom crust 1 inch from rim of plate. Place filling in crust. After rolling pastry for top crust, cut into 1/2-inch-wide strips. Place half of the strips about 1/2-inch apart crosswise over first strips. Trim strips evenly with edge of overhanging crust. Fold edge up, forming high, stand-up ridge; flute edge as desired.
Classic Lattice Top
Make pastry for Two-Crust Pie, except trim overhanging edge of bottom crust 1 inch from rim of plate. Place filling in crust. After rolling pastry for top crust, cut into 1/2-inch wide strips. Place half of the strips about ½ inch apart on filling. Weave remaining strips over and under first strips. Trim strips evenly with edge of overhanging crust. Fold edge up, forming high, stand-up ridge; flute edges as desired.
Whole Top
For a classic pie, covered with a lightly browned crust, follow the Two-Crust Pie recipe. This is the style of pie crust used for most traditional fruit pies. The directions for this recipe explain exactly how to roll out both top and bottom crust. The keys to this type of crust include sealing the pastry so juices cannot escape and cutting slits in the top to let steam escape.
Decorative Cut-Out Top
For an extra-pretty pie, make decorative cut-outs on the top of a two-crust pie. Use a small cookie cutter, and cut shapes from the top crust before placing it on the filling. Place cut-outs on top of the pie crust, attaching with a little cold water. Sprinkle with coarse sugar.
Crumble Top
For an extra decadent pie, nothing tops a crumble. A simple mixture of flour, butter, sugar and spices adds untold flavor and takes some of the work out of a scratch-made pie, since only a bottom crust is needed. We recommend giving this topping a try with our recipe for Dutch Apple Pie.
More Tips for Showstopping Top Crusts
Adding a gourmet touch is simple when you use one of the methods below. Note, pie crusts may brown more quickly with these methods. If this happens, put a sheet of foil loosely on top of the pie to slow the browning.
- Shiny crust: Brush crust with milk.
- Sugary crust: Brush crust lightly with water or milk; sprinkle with granulated sugar or white coarse sugar crystals.
- Glazed crust: Brush crust lightly with beaten egg or egg yolk mixed with a teaspoon of water.
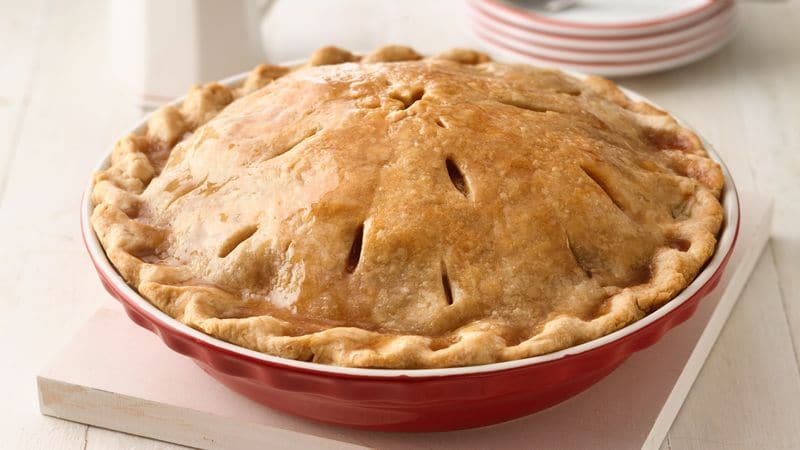
You can also add a glaze to your pie after it has baked.
- Glaze for baked pie crust: In a small bowl, stir together 1/2 cup powdered sugar, 2 to 3 teaspoons milk, orange juice or lemon juice and if desired, 2 teaspoons grated orange peel or lemon peel. Brush or drizzle over warm baked pie crust, but do not let glaze run over the edge of the pie.
Decorative Fluted Edges
Fluting the edge of a crust not only adds a decorative touch but also helps keep the filling from bubbling over. Start by forming a stand-up rim of pastry of even thickness on the edge of the pie plate; press edges together. This seals the pastry and makes fluting easier.
Here are some ideas to get you started.
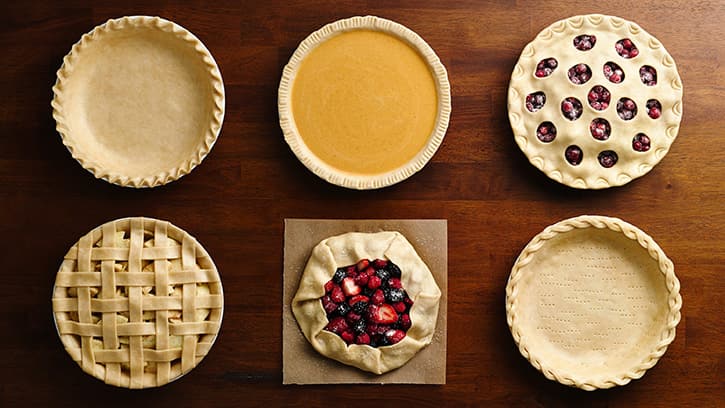
- Scalloped Edge: Place thumb and index finger about 1 inch apart on outside of raised edge. With other index finger, push pastry toward outside to form scalloped edge.
- Rope or Pinched Edge: Place side of thumb on pastry rim at an angle. Pinch pastry by pressing knuckle of index finger down into pastry toward thumb.
- Forked or Herringbone Edge: Dip fork tines in flour, then press fork diagonally on to edge without pressing through pastry. Rotate tines 90 degrees and press next to first set of marks. Continue around edge of pastry rotating tines back and forth.
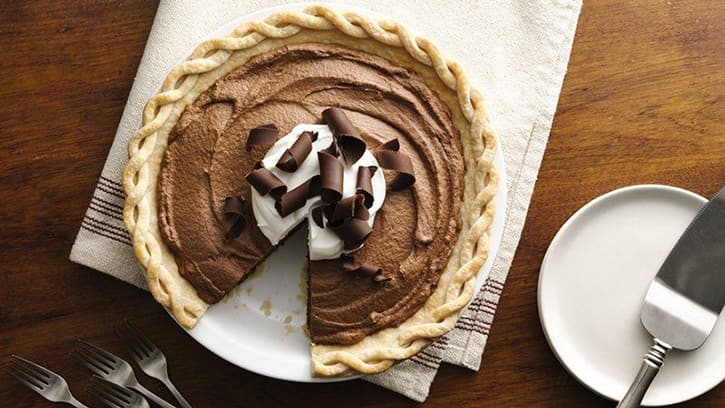
- Braided Edge: Cut rolled-out pie crust into 1/4-inch wide strips. Braid 2 or 3 strips together. Lay braided strips, you’ll need about 3, on moistened pie edge; press lightly to adhere.
- Galette: Fold crust edge up and pleat. The crust will not cover the filling in the center. Brush egg white over edge of crust with pastry brush and sprinkle with turbinado sugar.
Types of Pie Crust
Pie crust can be made with a variety of fats, from our favorite, shortening, to the classic lard. Butter and shortening are also a great combination, and we love using vegetable oil for an extra easy, vegan crust.
Here is your introduction to different types of pie crust, plus a few recipes to get you started.
Pie Crust with Shortening
Betty’s One-Crust and Two-Crust Pie recipes use shortening. Shortening makes for a tender, flaky crust and is often preferred for this reason. It is also easy to work with, because it doesn’t melt as quickly as some other fats. Do keep in mind that Betty’s One-Crust and Two-Crust Pie recipes can also be made with a combination of butter and shortening. If you’ve never made a shortening crust, we recommend getting started with five-star French Silk pie.
Pie Crust with Butter
If you like the taste of a butter crust, substitute cold butter cut into 1/2-inch pieces, for half of the shortening called for in Betty’s One-Crust or Two-Crust Pie recipes. The milkfats in butter will also help the crust brown nicely.
Pie Crust with Lard
Throughout American history, lard has been used to make pie crust pastry. Lard was easy to come by when more Americans lived on farms and using leftover pork product was an economical way to make pies before butter and shortening were as readily available as they are today. Throughout the 20th century, our eating habits changed drastically, and lard fell out of fashion, especially as alternatives, like shortening were introduced around mid-century. Recently, however, lard has seen a resurgence. If you have lard on hand, try swapping it in for the shortening called for in Betty’s recipe for One-Crust and Two-Crust Pie. As both lard and shortening are solid fats, the pastry should turn out fine. However as with any substitution, you may notice a slight change in the texture and flavor of your pie crust.
Pie Crust with Oil (Vegan Pie Crust)
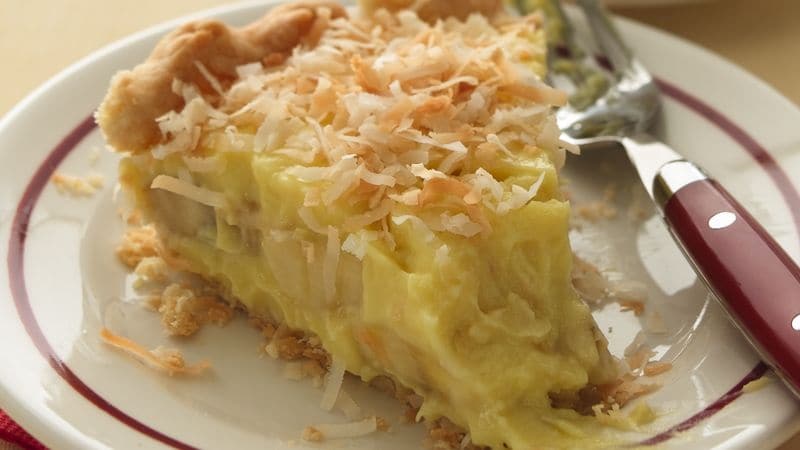
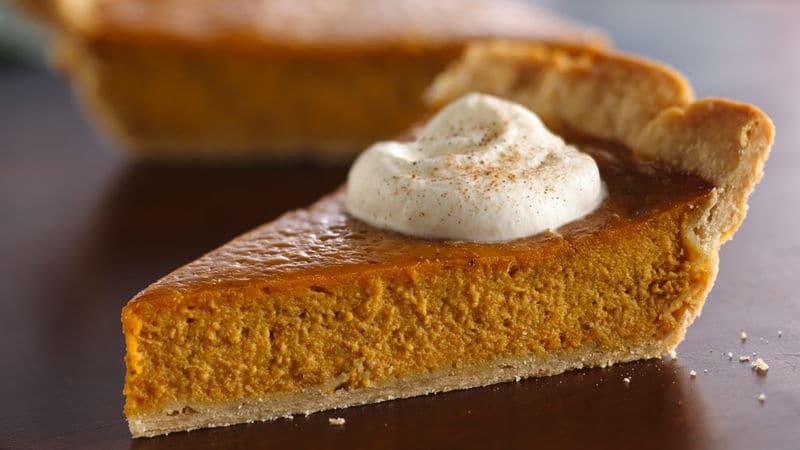
If you wish to make a vegan pie or are just in a hurry, a crust made with vegetable oil is perfect. No rolling is needed for this crust and because of its texture, it should be used for pies that have a bottom crust only. Try this method for yourself with Betty’s recipe for Pumpkin Pie. Looking for a totally vegan pie? This delicious new Banana-Coconut Cream Slab Pie should do the trick!
Pie Crust Tips
Here are a few more tips for making the perfect pie.
- Use ice-cold water to make the crusts. Add an ice cube to the water to keep it cold.
- Use a pastry blender to mix the shortening and flour. A fork will work too.
- Overworking the pastry dough will make it tough, so handle it as little as possible.
- Use the size pie plate or pan called for in the recipe. Use a heat-resistant glass pie plate or dull aluminum pie pan. Shiny or disposable pie pans reflect heat and prevent crusts from browning. Dark pans absorb heat, causing overbrowning. Nonstick pans cause an unfilled crust to shrink excessively. It is not necessary to grease the pan as pastry is high in fat.
- Prevent crusts from over-browning by shielding them with a pie crust shield ring or 2- to 3-inch strip of foil. Remove pie shield or foil strips 15 minutes before baking is complete so that edges can brown.
- Cut cooled pies with a sharp, thin-bladed knife. For meringue or ice cream pies, dip the knife in warm water and wipe clean before cutting. Use a pie cutter or wedge-shaped spatula to remove each slice.
How to Store Pie Crust
After spending time lovingly making a scratch pie crust, you’ll want to know how to store pie properly.
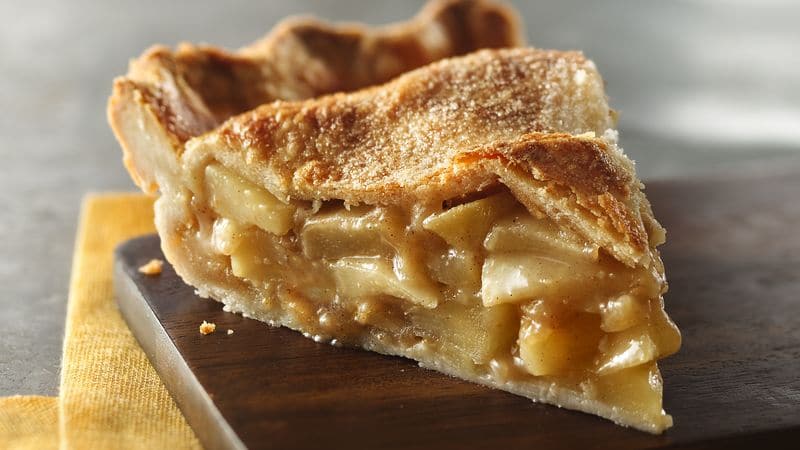
- Fruit pies can be stored at room temperature for up to two days.
- Refrigerate all pies containing eggs, dairy products or meat – such as cream pies, custard pies and quiches – for no more than two days.
- When in doubt, refer to the recipe, which should indicate how to store the pie.
- To keep a pie from getting soggy, allow the pie to cool completely on a cooling rack.
Freezing Pie Pastry
Unbaked and baked pie pastry (without filling) can be frozen for up to two months.
- For rounds of pastry dough, wrap tightly in plastic wrap and freeze. Thaw in refrigerator before rolling and filling.
- For unbaked pastry crust in a pan, wrap tightly in foil or place in a freezer plastic bag. There’s no need to thaw before baking.
- For baked pastry crust in a pan, wrap tightly in foil or place in a freezer plastic bag. Thaw before using.
Freezing Filled Pies
Filled unbaked and baked pies can be frozen for up to two months.
- Completely cool baked pies before freezing.
- Do not freeze cream, custard and meringue-topped pies. The filling and the meringue will break down and become watery.
- Fruit pies can be frozen unbaked or baked. Pecan and pumpkin pies need to be baked before freezing.
- Thaw unbaked frozen pies in the refrigerator before baking.
- To serve baked frozen pies, unwrap and bake at 325F for 45 minutes or until thawed and warm.
Now for the fun part, figuring out what to put between the crust! From fruit pies, like strawberry pies and lemon pies, to chocolate pies, cream pies and so much more, Betty’s got every pie recipe you could ever want!